You are here: Building the Model: General Elements > Processing > Defining Entity Processing
How to define entity processing graphically:
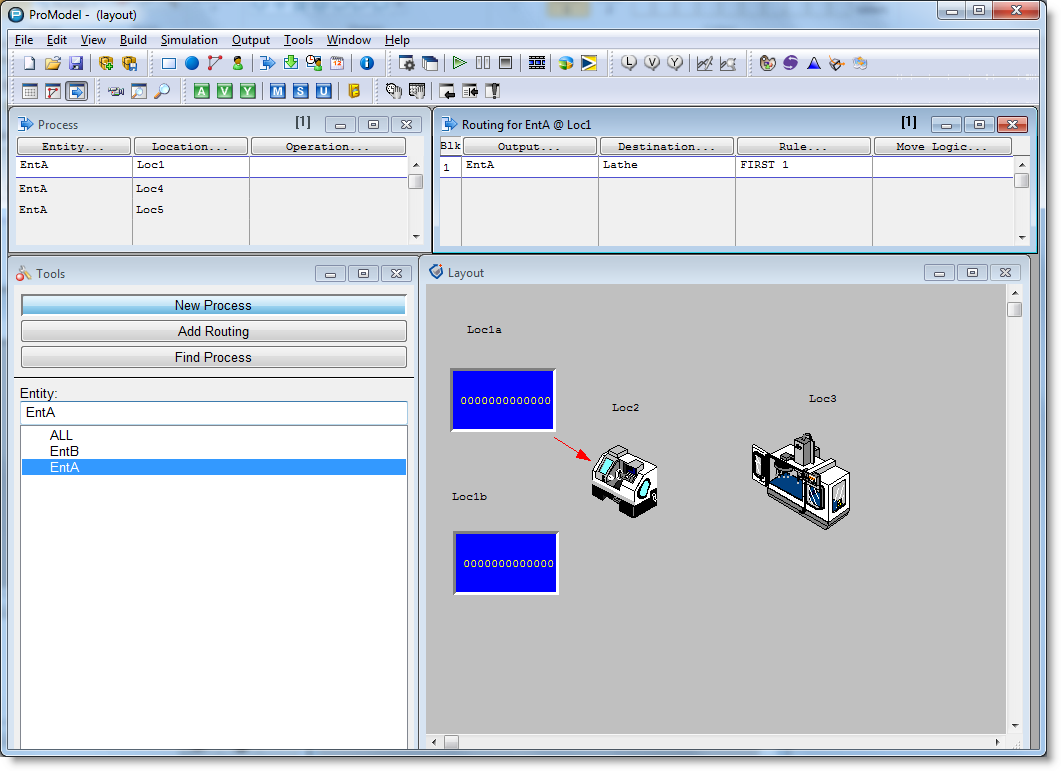
1. Select an entity from the entity list in the Tools window. The selected entity will appear in the edit field at the top of the list—this entity will come into the location, it is not the entity that results from the process.
2. Select the desired editing mode: New Process or Add Routing.
3. Click on the first location where the entity will process. A rubber-banding routing line appears. If you select Add Routing, the rubber-banding routing arrow automatically appears from the current location.
4. To choose a different entity as the output entity, select the desired output entity in the tools window.
5. Click the destination location.
Please note
In the example below, we first clicked on Loc1A and then on Loc2. The records in the Process and Routing edit tables were entered automatically.
6. Repeat this process until the flow of entities has been completely defined except for exiting the system.
7. From the final processing location route an entity to Exit by clicking on the "Route to Exit" button in the Tools window.
8. Once all routings have been defined, enter the processing logic in the operation field of the Process edit table.
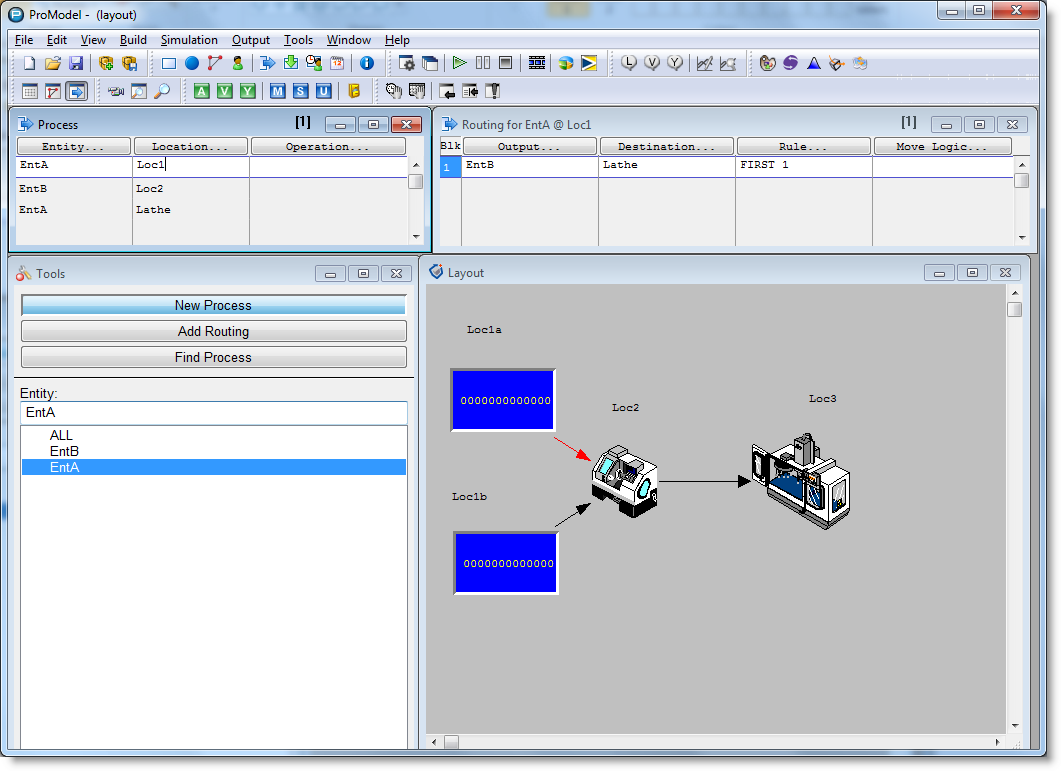
The figure above shows the completed routings for the example model. Note that the operations (for example, Join 1 EntB) have been entered manually in the operation column. These operations could also have been entered by way of the Logic Builder, documented at the end of this section.